Yo-Yo Coin Purse Tutorial
I have been making these little cuties for years and I am excited to be sharing with you a tutorial so you can make them too! I hand sew and glue these and that is the technique I will be sharing with you. It is the perfect small project for hand sewing.
What you will need:
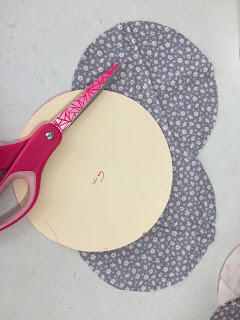
2- 6" circles cut from your base fabric
2- 6" circles cut from a coordinating fabric
2- 4" circles cut from your base fabric and 2- 4" circles cut from felt and 2-4" circles cut from your coordinating fabric
and fabric glue, needle and thread, 6" or 7" zipper in a coordinating color and a 5" piece of ribbon folded in half.
Use your fabric glue to adhere the 4" coordinating fabric circle to the center of the 6" base fabric circle on the right side of the base fabric, leaving a 1" gap to insert your ribbon and then glue shut.
Turn your circles over and glue the 4" felt circles to the center of the base on the wrong side of the fabric
Get your needle and thread ready because here we go!! Time to add the zipper! Unzip the zipper place the it face down against the coordinating fabric.
Straight stitch the zipper along the outside of the coordinating fabric. Stay just to the outside of the 4"circle.
Then repeat on the other side with the other part of the zipper.
Pull zipper to close.
Run a straight stitch along the open end around the felt circle to close.
Run a gathering stitch along the edge of the base fabric to gather up like a yo-yo.
Repeat on the other side.
Run a gathering stitch along the edges of the 6" coordinating fabric circles to make two yo-yos
Attach them using fabric glue to either side of the coin purse to cover felt.
Make 2 more yo-yos using a running stitch from your last two 4" circles from the base fabric.
glue them in the center of the coordinating fabric yo-yos
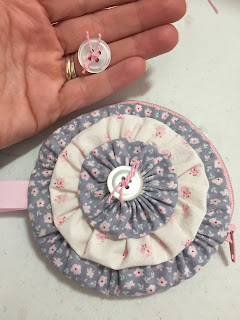
You can use any kind of embellishments to place in the center of the top yo-yos. I usually add a button.
And there you have it! An adorable little hand made coin purse!
This is a link to the video tutorial I followed a few years ago to learn how to make these in the first place.
I hope you enjoyed this tutorial. Please leave me a comment!


Comments
Post a Comment